OVERVIEW
Region :- Uttarakhand
Duration :- 8 Days
Grade :- Easy To Moderate
Max Altitude :- 16240 Ft Ft.
Approx Trekking Km :- 56 Kms.
Brief Description
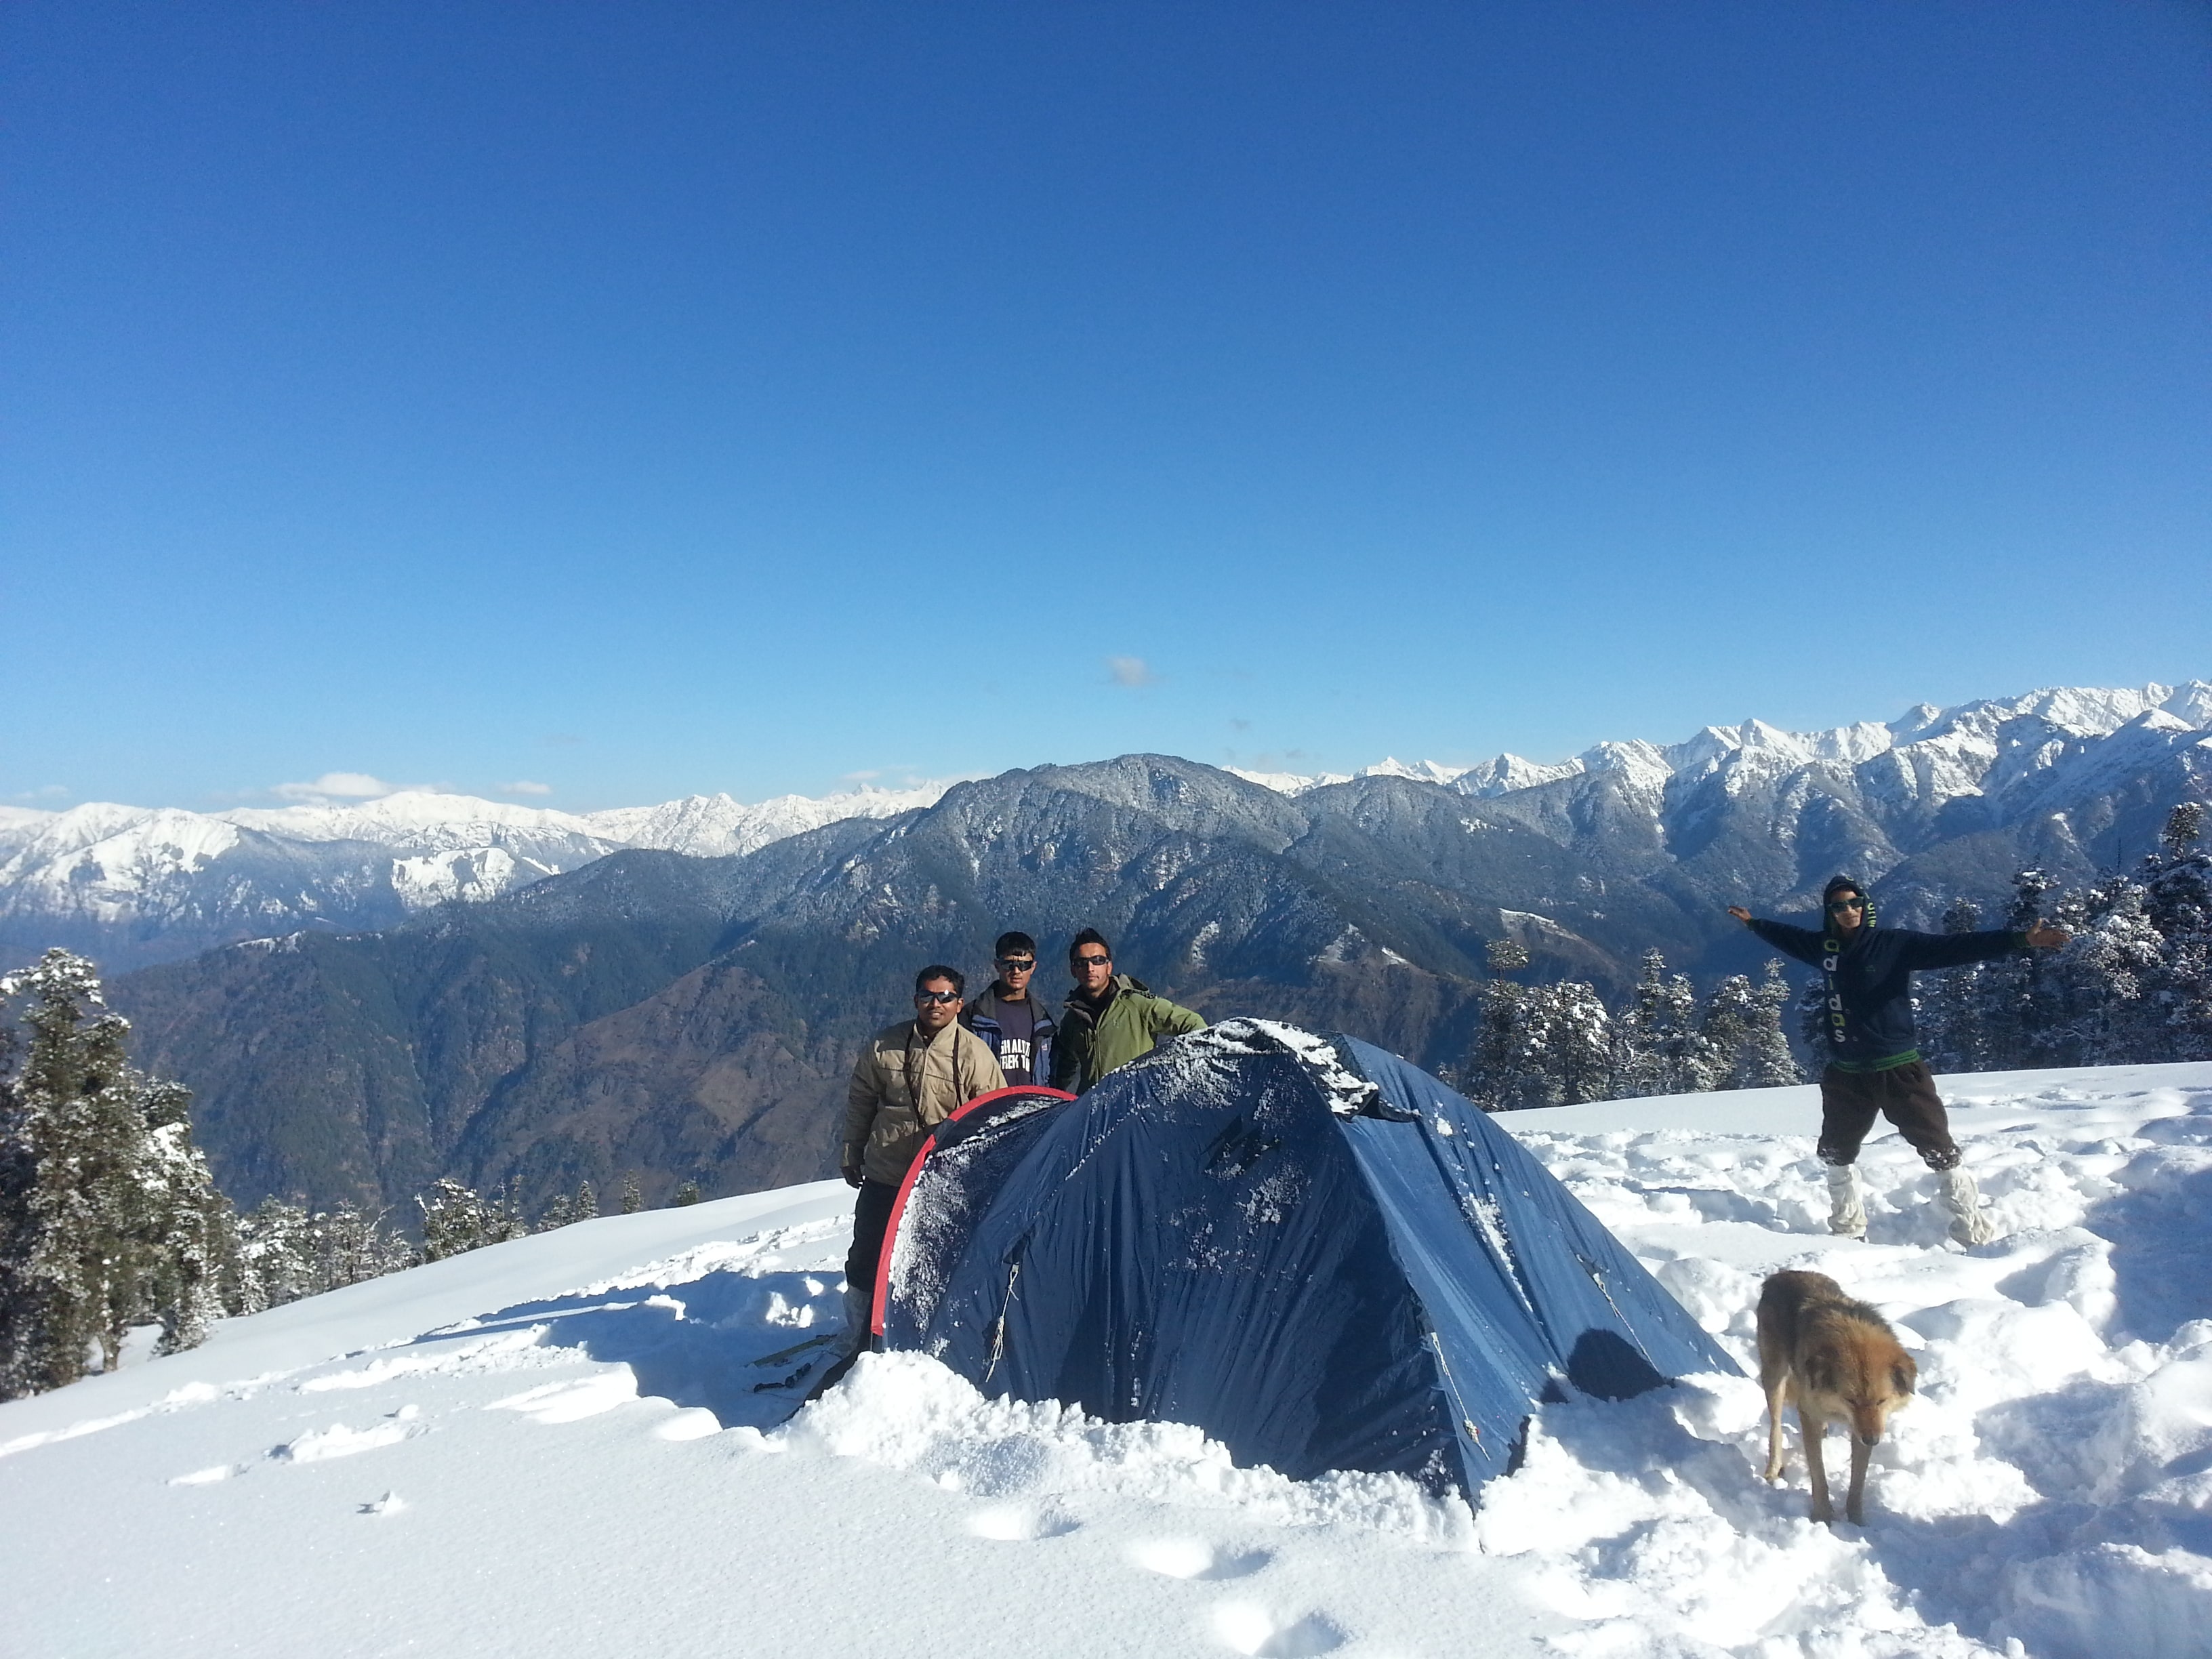
Connecting Yamunotri and Har Ki Dun Valley Bali Pass trek at an altitude of 16240 ft. is a difficult trek meant for seasoned trekkers only. Bali Pass trek starts from Sankri village in Uttarakhand and ends at Janki Chatti. This trek offers splendid panoramic views of Bandarpoonch, Kalanag, and Swargarohini peaks. The alpine meadows of Dev Thach in the middle of the Ruinsara forest is something to look out for. The Ruinsara lake has unmatched beauty and grandeur. Bali Pass trek should be in the list of trekkers who wish to experience the nature at its best and push their limits. The best months to do Bali Pass trek are from May to June and from September to October. Stay on this page for everything you need to know about the Bali Pass trek including Bali pass route map, itinerary, temperature chart, photos, videos, and reviews. Scroll to the end to read Bali Pass trek blogs.
Why Apex To Himalayas?
- Learning Experience: We do not just focus on completing the trek but also help you develop basic trekking skills like:
- Packing a rucksack
- How to pitch and dismantle a camping tent and properly use a sleeping bag
- Ascend and Descend on a mountain trail
- How to ensure camp safety and hygiene
- Identify trail signs and signals
- Loyalty Programs: Join Apex To Himalayas community and enjoy benefits of our vouchers and referral programs.
- Personalized attention: We have small batch size (max. 15) and we maintain a healthy ratio of 8:1 (Participants : Leader) on all our batches to enable individual focus and monitoring.
- Best Expedition Leaders: Our leaders are advanced mountaineering course qualified, specially trained in rescue procedures from NIM and certified first-aid responders. Even our local guides are certified first-aid responders.
- Safety norms: We have mapped every region with an emergency evacuation plan and safety protocols maintaining a zero accident record so far. We carry an extensive first-aid kit including oxygen cylinders and high altitude medicines.
- Safety equipment: Our trek leaders carry UIAA certified rescue equipment like static rope, ice ax, harness, carabiners, jumar, pulley, short and long slings.
Short Itinerary
Day 1: Drive from Dehradun to Sankri. Approx. 8 hour drive. The cab costs Rs.5,000 per vehicle, shared by 5 trekkers.
Day 2: Sankri to Taluka drive then Taluka to Chilurgad trek – 11 km trek
Day 3: Chilurgad to Devsu Thach – 6 km trek
Day 4:Devsu Thach to Untigad – 9 km trek
Day 5: Untigaad to Thanga via Ruinsara – 4 km trek
Day 6: Thanga to Advance Base Camp – 4.5 km trek
Day 7: Advance Base Camp to Lower Damini via Bali Pass- 16 km trek
Day 8: Lower Damini to Yamunotri to Dehradun – 1.5 km trek and then 8 hour drive.
You’ll be back in Dehradun by 8 pm. Organise your return transport only post 9 pm.
Detailed Itinerary
Day 1 - Drive from Dehradun to Sankri
Altitude of Sankri: 6,398 ft
Drive duration: 10-11 hours
Sankri is a charming village with a few dhabas and some shops. Stay at the Orchit Hotel slightly up the road. Most trekkers get to Sankri in the evening, which is a good time to lookout for the sun setting on the Greater Himalayan mountain ranges. The peaks of Swargarohini shimmer in the evening sun, standing tall over the ridges beyond Sankri.
Day 2 -Sankri to Chilurgad via Taluka
Alttude: 6,398 ft to 8,159 ft
Distance: 12 km drive, 11 km trek
Duration: 1 hour drive, 7-8 hours trek
GPS Coordinates of Chilurgad: N 31°06.720, E 078 °19.965
There is a road that connects Sankri with Taluka. This 12 kilometre-long journey may be covered by hiring a local jeep (subject to the condition of the road as this is a landslide-prone route, often closed during monsoon). The trail is almost a level-walk going through 10 to 11 mountain bends.
On the way, there are three major streams gushing down the road, almost submerging certain sections of the road. The hike is scenic, going past a series of wild roses, irises and bamboo, chestnut and deodar trees. Around 2 km before Taluka, there is a campsite beside a stream. Camp here in case there is not enough time to trek till Seema.
Taluka village is a small one, centered on concrete houses that look out of sync with the village architecture seen at Sankri, Osla, Gangad etc. There is a Orchit Hotel for accommodation. The dhaba food here is very basic.
From Taluka, next to Forest Guest House, the trail descends to the river valley of Supin and continues through a series of forests on your left as the river remains on your right. This shepherd trail goes along the river on a level walk. Around 10 minutes into the hike, you will see the first cemented bridge on a small stream. Another 15 minutes of level walk will have you reach another bridge, this time a wooden one. These two spots are conducive to fill up drinking water.
From here, walk by a series of gradual descends for 15 minutes, till you see a small clearing next to the river. This is an option for setting up an emergency camp if need be. Another 10-15 minutes later, you see a section where you climb down, meeting the Supin’s tributary that flows on your right side. Look for a wooden bridge that can be used in crossing this river, just below Datmir village.
After crossing the tributary, there is a short climb of less than a minute till you reach a camping ground. From here, facing the inside of the valley, locate two trails, one moving up and the other going straight ahead. Take the one that goes straight ahead.
The trail will now deteriorate, owing to a series of landslide-prone sections adjacent to the Supin River. Around 15 minutes of level walking later, you reach a land cleared by shepherds to setup temporary night shelters. The trail moves up with a series of gradual climbs followed with level walks. Around 10 minutes into the hike, look out for your first landslide-prone section. You may have to come down the river and cross the section that has caved in.
After 20 minutes of similar walking, spot a river crossing option via a wooden bridge over Supin River. Ignore it and proceed straight ahead. After five minutes, there will be the first section of steep incline trail in a zig-zag formation. This section will take about 15-20 minutes to cover. During rainy season, expect this trail to be completely in covered in mud. The trail now will relax with a series of level walks till you see a big stream coming down the hill on your right, over a wooden bridge crossing.
The trail picks up a little altitude as you once again enter the forested cover with a series of ascents and level walks. After 30-40 minutes of easy walk, look for an old village setting across the river on your left. This is Gangad village. After another 20 minutes of level walk, take a diversion towards the right side, till you reach a dhaba next to a wooden bridge crossing.
Behind the dhaba is a small hut where locals use the momentum of water to run a mechanical turbine that grinds cereal into flour. Those who want to camp at Osla may cross a wooden bridge to get to the other side of the mountain, left of Supin River and then trek straight along the river till they reach Osla. To reach Seema, one has to trek straight up by remaining at the true right of the river, all the way till Seema. There are a few steep ascents but are not in continuity, as the trail relaxes giving certain sections of level walks.
The landscape and condition of terrain will remain like this for an hour and a half. Look for cemented houses built across a series of barley and wheat fields towards your right. The ground next to the cemented house is Chilurgad. One can camp here for the night as there is no spot available in Seema for camping.
Day 3 - Chilurgad to Devsu Thach
Altitude: 8,159 ft to 10,016 feet
Distance: 6 km
Duration: 4-5 hours
GPS Coordinates for Devsu Thatch: N 31°07.442, E 078 °23.042
Start early in the morning, taking the trail going ahead from the campsite. Pass a cemented bridge and take the trail going ahead. Observe Osla wooden bridge towards your right over Supin River, which goes to Osla village. The trail is a well-defined leveled one, with few gradual ascents.
After 20 minutes of trekking, you will reach Seema. Pass a series of dhabas and GMVN and Forest Guest Houses in Seema. A 200 metre-long brisk walk will have you pass another bridge, crossing over River Supin. Do not cross over.
Take the trail going down, with River Supin on your left as you by-pass the bridge. Ensure you do not take the trail ascending from here. Note that from here onwards, the trail gradually ascends as you near the entry point of Ruinsara Valley. Pass by a series of streams and landslide zones.
Around 30 minutes into the hike, you will cross a series of huge boulders as you enter Ruinsara Forest. The trail from here ascends sharply over the boulders. Leaving the river below you, climb up briskly as you near the point from where the trail takes a right. This is the point from where you will be able to see Osla village behind you for the last time, as you enter the Ruinsara Valley.
Another 30 minutes of level walk later, you will enter the meadows of Devsu Thach. Follow the trail going from the centre of the meadow surrounded by tall trees all around. Devsu Thach is approximately 2 km in length and is a delightful walk.
On your left, observe Har Ki Dun Valley, below which is the confluence of Har Ki Dun and Ruinsara rivers. Walk for another 15 minutes till you reach the last section of the pasture land.
Day 4 - Devsu Thach to Untigad
Altitude: 10,016 ft to 11,450 ft
Distance: 9 km
Duration: 4-5 hours
GPS Coordinates of Untigad: N 31°05.019, E 078 °26.912
From Devsu Thatch, look for a forest trail descending sharply towards the Ruinsara river below. The descent is rapid and steep. Around 15 minutes and 100 meters of careful descent later, you reach a wooden bridge that crosses over River Ruinsara. Observe the Ruinsara Valley towards your right. Cross the bridge and take the trail going inside the valley, with the river on your right.
A wooden bridge across the Ruinsara River. Picture by Akhlesh Tomar
The next 45 minutes of the trail are a series of level and gradual ascents over boulders and patches of pasture land next to the river. Observe a cemented hut ahead of you. This is a good spot of camping or taking a break for lunch.
The condition of the trail deteriorates rapidly from here forth as you trek towards the interiors of the valley. Pass through three mountain bends, after which you’ll pass through a series of landslide zones. The trails have been completely or partially broken in these sections. Take great care in crossing these sections.
Depending upon the conditions, one may have to use ropes for crossing over the broken bends. These sections are consistent for another hour and a half till you reach a waterfall at your left side. Descend down the trail and pass the waterfall section. Once crossed, the trail again ascends sharply as you leave the last bend and enter a series of meadows covered with glacial snow and scree. Walk over this ridge carefully.
In a few minutes, you’ll come across a vast meadow with birch forests forming a background. The Untigad campsite is another 30 minutes’ walk from here. There is a small river-crossing over a tributary of Ruinsara here. The crossing is fairly simple. Once crossed, walk straight and re-join the trail that is next to River Ruinsara. Look for a makeshift bridge over the river. The ground towards the left of this bridge is Untigad.
It is advisable to camp here rather than Ruinsara Lake, as this camping ground is more secure from cold winds. It is also on the next day’s trail to Ruinsara Lake, however, is a 30 minutes’ hike ahead. One can halt at Untigad and do a short excursion to the lake and return to the campsite.
Day 5 - Untigad to Ruinsara Tal and further to Thanga
Altitude: Approximately 12,000 ft
Distance: 4 km
Duration: 4-5 hours
GPS Coordinates of Ruinsara Tal: N 31° 04.831, E 78° 27.499
The trail to Ruinsara Lake goes inside the birch forest towards the true left of the river. Ensure you do not meander towards the right. Once you leave the forest behind, cross a boulder zone till you see a hut on your right ahead. Walk towards the hut. Observe Ruinsara Lake below you towards the left. The lake is surrounded by meadows where one can camp. Swargarohini ranges are behind the mountain ridge next to the lake and are not visible from here.
From Ruinsara Tal, follow the trail until you reach Thanga. The trek should not take you more than 3 hours.
Day 6 - Thanga to Advanced base camp via Odari (Bali Pass Base Camp)
Altitude of Odari: 13,287 ft, ABC: 15,154 ft
Distance: 5 km
Duration: 5-6 hours
GPS Coordinates of Bali Pass A.B.C: N 31°02.482, E 078 °26.837
Today is a light day with a promise of great views of the entire Ruinsara and Kyarkoti Valley. Cross the bridge from your campsite and take the landslide-prone trail on your left. The mountain ridge is completely broken as you ascend through a maze of boulders. It takes 20 minutes to cross this till you reach level ground and are able to see a tributary of Ruinsara River passing on your left.
Look for a suitable spot for river crossing. It is advisable to start early so that the depth of water is not high. There is no makeshift bridge and one may have to boulder hop across this tributary. A rope can be handy as well, though not necessary. Once you’ve crossed, take the trail going straight towards the snow moraine that lies ahead, keeping Ruinsara River on the left.
Treat yourself to the beautiful Swargarohini ranges that are completely visible for the first time. You’ll see the first patches of snow in the meadows ahead. Cross over these meadows and move to the right side of the valley as you start gaining considerable altitude. The steepness of the climb gradually increases as you enter the snow line. The snow is slippery here and a micro spike/crampon is very handy in this section.
The route to Odari swerves to the right. You now enter a funnel valley. In an hour or two (depending upon the pace of the ascent), you will reach the top of first ridge. From here, you can see a small snow ridge. Behind that ridge are the ice fields of Odari.
The views of Kyarkoti towards the left and Swargarohini massif behind you are outstanding. The trek from here to the B.C. is another 20-30 minutes of gradual ascent over slippery snow. Observe a level ice field with a few semi frozen small glacial ponds in between. This is Bali Base Camp. Look for a level ground for pitching the tents. In the month of June and July tents will be pitched on hard snow.
If one wants to trek further, one can proceed ahead to the Advance Base Camp of Bali, which is another 2-3 hours on a snow ridge away.
Today is a short day but involves a steep climb as you gain nearly 2000 ft of altitude in a 1.5 km distance.
Start very early in the morning, preferably around 4 or 5 am. One can start much earlier, depending upon prevailing weather conditions. Micro-spikes are required for today. There is also a section where ropes need to be fixed. Carry plenty of water as there are no water points for a long section of the trek.
Looking ahead, observe a series of five snow ridges that need to be traversed. Bali Pass summit is not visible from this section for the moment. It takes around 30-45 minutes to climb to the top of the third snow ridge as you gain an altitude of 200 meters.
From this spot, you will be able to see a snow ridge line that connects to a steep climb over a series of snow ridges. The initial walk is a gradual walk over a level ridge. There is huge accumulation of snow all around. It is wise to remain on top of the ridge and climb up via that route. No ropes are required here.
These sections are not technical but are long and tiring. After an hour or two (depending upon your pace) you will reach the top of the fifth ridge. From here, you can see Bali Pass Col towards your left ahead. Below the pass is the camping spot of A.B.C. Walk towards the left side, crossing as many as three snow dunes to reach the spot, from where the true ascent of Bali Col begins.
Day 7 -Bali Pass Advanced Base Camp to Bali Pass and further to Lower Damini
Altitude: 15,147 ft to 16,207 feet to 11,076 feet
Distance: 14 km
Duration: 9-10 hours
GPS Coordinates of Bali Pass: N 31°01.909, E 078 °26.392
GPS Coordinates of Lower Damini: N 30°59.919, E 078 °27.218
The climb to Bali Pass is steep and you might require an expert guide to find the route. There are no crevasses here, but there’s a lot of snow. An ice axe is useful here, to ensure sure footing. It is advisable not to take a straight line ascent route. Making scissor-bend trails is more practical.
The climb can take anything from 45 minutes to one and a half hours. As you reach the top of the mountain col, you will be able to see the Yamunotri side of the valley for the first time.
The Bali Pass summit is another 10 minutes of ascent towards the connecting ridge on your left. The last climb is again steep, but doable. The summit of Bali pass has enough space for a large group of 30-40 people to assemble.
Once you’re reached the Bali Pass summit, enjoy a clear 360 degree view of the Ruinsara and Yamuntori side. One can see Bandarpoonch (White peak) and Kalanag (Black Peak) and also the logical route to Saptarishikund.
Look down towards the Yamunotri side for a connecting snow ridge that descends. This is from where you will descend. Fixed ropes need to be placed in the initial 60-70 metres. Care must be taken while descending. The second section of descent can be done by merely sliding down towards the A.B.C. site on the Yamunotri side.
Once down, observe snow fields descending on your right. There are multiple routes that one can take to descend from here. Moving down on soft snow can be done swiftly. After 15 minutes, you will reach the last point of the A.B.C. ridge. From here, there is another sharp descent down to base camp. Let an experienced team member find a best possible descent route from here. You will cross a few boulders over snow. Once this section is crossed, one can slide down till the B.C. From here, move briskly as you lose altitude. Another 30 minutes of brisk descent later, you will be required to traverse to the right side of the mountain ridge till you reach the pinnacle.
From here, you will be able to see the upper and lower Damini forest ridge below you. The descent from here is tricky, especially if there is snow. If the accumulation of snow is large, you may need to place ropes. The trails here are nonexistent and one has to descend sharply over huge boulders and snow. Look for a land clearing 500 meters below you. This section is like a maze and the team must do this with extreme caution. It may take an hour or two to cross this section safely.
Once you enter the upper forest of Damini, rejoin a well-laid trail that now descends rapidly. There is no water source at Upper Damini camping ground anymore. Hence, it is advisable to trek down to lower catchment area inside the forest. The trek down is another 2-3 km, till you reach a small camping spot next to a stream. You have now reached lower Damini camping spot. (One can also camp at the Base Camp location in the Yamunotri side of Bali Col, depending upon weather conditions.)
Day 8 -Lower Damini to Yamunotri and back to Dehradun
Altitude: 11,076 ft to 10,797 ft
Distance: 1.5 km trek
Duration: 1 hour trek, followed by 8 hour drive
Today is an easy day. Take the trail descending the lower Damini forest. The trail is well-defined and after 30 minutes of steep descent, you will connect with the old Yamunotri trail. Take a left if you want to detour and visit the Yamunotri temple. Otherwise, take a right and follow the trail that descends and connects with the new Yamunotri to Janakchatti pilgrim trail.
The trail from here is cemented and one can reach Janakchatti in couple of hours. From Janakchatti, board a bus or a shared jeep to Dehradun or Barkot.
Risk & Respond
High Altitude Treks?: Risk and Response A high altitude trek calls for an adventurous attitude, but embarking on an adventurous trip without calculating the risks is utter stupidity. That’s why we have listed a few risks and the response planned by Apex To Himalays to minimise or address the risks in the best possible way.
Risk: Altitude Before you start the trek, it is important to understand the implications of high altitude on your body. Be aware of symptoms of AMS (Acute Mountain Sickness) like mild headache, nausea and general discomfort.
Response: If you feel any of these symptoms, inform the trek leader on priority and follow his instructions. Every campsite has as stretcher, fully equipped first aid kit, oxygen cylinders to address the situation.
Risk: Weather Weather is unpredictable in the Himalayas. Though we are always observant about the changing weather, no one can guarantee a snowfall, rain or Sun. Do understand that your security is of utmost importance to us and we will not proceed any further from the campsite if the weather is not favourable.
Response: The decision of the Trek Leaders and Guides to proceed or wait for the weather to get better will be final.
Risk: Injuries Often, while trekking over difficult terrains, you might have minor injuries like leg sprain, bruises etc. Serious injuries like fractures or major cuts are very rare.
Response: All our Trek Leaders are Certified Wilderness First Aid responders. They are trained to handle emergencies and can tackle minor injuries with a well-equipped first aid kit. In case of serious injuries, the patient is carried on a stretcher to the nearest road-head and is led to nearest medical centre.
Risk: Lack of communication devices In the remote areas of the Himalayas, mobile networks do not reach. On a trek, one is cut off from the world of calls, SMSs or watsapps.
Response: We rely on walkie-talkies and runners to communicate between the campsites and the base camps.
What's Included
- Transport: Dehradun to Sankri and Return.
- Meals while on trek (Veg. + Egg).
- All necessary entry fees and permits.
- Accommodation:- Guest house, Home stay, camping during Trek.
- Mountaineering qualified & professional trek Leader, guide, cook and Support staff.
- First aid medical kits, stretcher and oxygen cylinder.
- Trek equipments: Sleeping bag, mattress, tent (twin sharing), kitchen & dinning tent, toilet tent, utensils and crampon (if required).
- Apex To Himalays Staff Insurance.
- Porters/mules to carry central equipment.
- Any kind of personal expenses.
- Food during the transit.
- Mules or porter to carry personal luggage.
- Insurance.
- Any kind of emergency evacuation charges 6. Anything not specifically mentioned under the head.
Excluded :-
How to Reach
By Air :-
Jolly Grant Airport is the airport serving Dehradun, located about 25 km from the city. There is a daily flight from Delhi to Dehradun. Come one day early if planning to come by flight.
By Train :-
Take the overnight train to Dehradun from Delhi
- Nandadevi Express - Train no: 12205 (Departure 11:50pm; Arrival - 5:40am)
- Dehradun Express - Train no: 12687 (Departure - 9:10pm; Arrival - 5:00am)
By Bus:-
There is regular bus service from Delhi to Dehradun, from Delhi to ISBT Kashmere Gate.
We would suggest you to take only government buses from ISBT Kashmere Gate. Private buses ply from outside ISBT and they are not trust worthiness.
Usually buses drop you at Dehradun ISBT. From there you have to come to Dehradun Railway Station
- Apex To Himalays Tata Sumo or similar vehicles will pick-up you from Dehradun Railway Station at 6:00am.
- Pick-up is included in the cost of the trek
- You will reach Sankri by 4:00 pm
- Food from dehradun to Sankri is not included in the trek cost
Photo Gallery


6C. Dunkles Bock
Overall Impression: A dark, strong, malty German lager beer that emphasizes the malty-rich and somewhat toasty qualities of continental malts without being sweet in the finish.
History: Originated in the Northern German city of Einbeck, which was a brewing center and popular exporter in the days of the Hanseatic League (14th to 17th century). Recreated in Munich starting in the 17th century. The name “bock” is based on a corruption of the name “Einbeck” in the Bavarian dialect, and was thus only used after the beer came to Munich. “Bock” also means “Ram” in German, and is often used in logos and advertisements.
Quick Links
About Us
Photo Gallery
Enquiry
 Buy Online
 Buy Online
Tour Packages
Harki Dun Valley Balipass Trek Borasu Pass Trek Runsara Lake Trek Phulara Trek Kedarkantha Peak Trek Rupin Pass Trek Nag Tibba Trek Sarul Tal Trek Valley of flower Trek
 Camping with Bonfire
Adventure Activities Rafting Zip Line Rappelling Camping
Average Temperature: Summer temperatures: Day time: 8°C-15°C; Night time: -5°C-3°C